If your house numbers keep fading, falling off, or just don’t feel like you, I get it. Finding something that fits your style and budget can be a real challenge. But making your own? It’s easier than it sounds.
In this guide, I’ll walk you through each step, from picking the right materials to building and hanging your house number sign. I’ll also share a few design ideas and simple lighting tips that can help your sign stand out.
You don’t need to go big to make a change. With just a bit of time, you can turn this small project into a strong, lasting upgrade for your home’s front look. Let’s jump in and get started.
Why DIY House Number Signs Are a Smart Choice
Creating a house number sign is a clever way to add a personal touch to your home’s exterior. You can choose the size, style, and layout that fit your space and taste.
It’s also cheaper than buying a custom-made one. Many store-bought signs come with high price tags, while a DIY version can cost just a few dollars using simple materials like wood, paint, or vinyl numbers.
Plus, it’s a quick and easy weekend project. You don’t need special tools or advanced skills. Even beginners can build a sign that looks great and lasts through the seasons.
It’s a simple way to boost your home’s curb appeal in just a few steps.
What You Need to Know Before You Start
Before building your house number sign, think about your home’s style, the materials you’ll use, and how visible it will be.
Finding the Right Style for Your Space
Pick a design that matches your home’s look. A modern sign has clean lines and bold numbers, while rustic styles use distressed wood and vintage colors.
Minimalist options are simple and neat with little decoration. A vintage sign may feature classic fonts or metalwork. If space is tight, go vertical for a slim layout that fits columns, fences, or posts.
Match the sign to your house exterior for a clean and unified look. Choose what feels right for your space.
Choosing the Right Material
Choose a material that matches your style, fits your budget, and is suitable for the weather where you live.
| Material | Pros | Cons |
|---|---|---|
| Wood | Easy to paint, affordable, great for rustic styles | Needs sealing, can warp or rot in wet weather |
| Metal | Durable, weather-resistant, modern look | Can be heavy and more expensive |
| Ceramic | Stylish and colorful, holds up to the sun | Can break if dropped or hit |
| Acrylic | Sleek finish, water-resistant, good for backlit signs | Scratches easily, may fade over time |
| Vinyl | Cheap, easy to apply, great for decals | Peels over time, limited in texture |
When picking a material, think about where your sign will go, how much time you want to spend on upkeep, and the overall look you’re going for.
Best Size & Visibility Guidelines
Your numbers should be at least 4 inches tall for street view. If your house is far from the road, go bigger, 6 to 10 inches. Use high-contrast colors like black on white or white on dark wood for better visibility.
Add lights or use reflective numbers at night. Avoid light colors on light backgrounds. Make sure plants or decor don’t block the sign.
Visibility matters for guests, deliveries, and emergency services, so keep it simple and easy to read.
How to Make a DIY House Number Sign
Want to add some personality to your home’s exterior? This beautiful cedar house number sign combines rustic beauty with a clean, modern finish. It’s waterproofed, framed, and customizable, and you can build it yourself using cedar wood, floating numbers, and a few basic tools.
Supplies & Tools You’ll Need
- Cedar wood planks (cut to length)
- Trim boards (for the frame)
- Scrap wood (for template)
- Saw (miter or hand saw)
- Drill + bits
- Brad nailer or hammer + finishing nails
- Tung oil (or other wood sealer)
- Exterior white paint
- Silicone sealant
- Construction adhesive or wood glue
- Floating house numbers + screws
- Pencil, measuring tape, clamps (optional)
Step 1: Cut the Cedar Boards
Start by cutting your cedar boards to the desired length, taking into account the overall height and style you want for your sign.
To ensure consistency in each piece, create a cutting template by clamping a scrap board to your saw as a guide. Once your first piece is cut to size, use the template to make the rest of your cuts, so all boards are uniform.
After cutting, align all of your cedar pieces vertically side by side to form the face of the sign. This vertical panel will serve as the main surface behind your house numbers.
Step 2: Cut the Cedar Backing
After aligning the cedar boards for the front panel, measure their total combined height. Use this measurement to cut one additional cedar board; this will serve as the backing board that supports the slats.
It should match the height of the panel precisely so the final frame sits flush and balanced.
Step 3: Cut Trim Boards at 45° Angles
Now it’s time to create the frame using trim boards. Begin by adjusting your saw to a 45-degree angle, which will allow you to create clean, mitered corners.
Cut one trim piece for the top of the frame, then use it as a template to cut the bottom piece to the same length.
Repeat this process for the two side pieces, measuring carefully to match the vertical length of your cedar panel. Arrange these angled pieces around the panel to ensure a snug fit and a uniform border.
Step 4: Sand and Seal the Wood
Before assembling, sand all of your wood pieces, including the cedar slats, backing, and trim, until they’re smooth to the touch. This helps remove any splinters or rough edges and prepares the surface for sealing.
Apply tung oil to the cedar slats to improve the natural wood grain and protect them from weather damage. For a contrasting design, paint two of the trim pieces (typically the vertical sides) with exterior-grade white paint.
Allow all pieces to dry completely before moving forward with assembly.
Step 5: Assemble the Frame
To assemble the trim frame, begin by using clamps to hold the 45-degree corners firmly together. Then use a nail gun or finishing nails to secure each joint.
For a seamless and weatherproof finish, apply silicone sealant to the inside corners and over the nail holes. This not only improves the frame’s durability but also helps keep moisture out.
Once the sealant has dried, repaint any sealed areas to maintain a clean, finished look.
Step 6: Attach the Cedar Backing
With the frame complete, position the cedar backing board in the center of the frame. It should be flush with the edges.
Secure the backing by nailing it into the top and bottom trim pieces. This provides a stable surface for the cedar slats and ensures the sign is sturdy once fully assembled.
Step 7: Install the Cedar Slats
To install the front cedar slats, apply a strong construction adhesive or wood glue to the backing board. Carefully place each slat into position, making sure they are evenly spaced and tightly fitted together.
Press each one down firmly to ensure a solid bond. Allow time for the adhesive to cure fully before proceeding.
Step 8: Final Sealing and Paint Touch-Ups
Once the cedar panel is assembled, inspect the entire sign for any nail holes or small gaps. Use silicone or wood filler to seal them, helping to protect the wood from future moisture exposure.
After the filler has dried, apply a final coat of paint to any areas that need touch-ups to give your sign a polished, professional finish.
Step 9: Attach House Numbers
Lay out your house numbers on the front panel, adjusting their spacing until you’re satisfied with the alignment.
When you’re ready, mark the screw locations by pressing an awl, pin, or nail into the wood to create small indentations. Pre-drill holes at those marks to avoid splitting the wood. Finally, use the included hardware to screw the floating numbers into place securely.
Step 10: Mount Your Sign
Your custom cedar house number sign is now ready to be displayed! Mount it to your chosen location using wall anchors, screws, or outdoor mounting brackets, depending on the surface material.
If the surface is brick, siding, or a fence post, use the appropriate mounting method. Once installed, your beautiful, handcrafted sign will not only improve your home’s curb appeal but also showcase your DIY skills.
Watch the full video tutorial below to see each step in action and follow along visually.
DIY House Number Sign Ideas to Try
These ideas help you add character to your home while staying budget-friendly and straightforward. Each one uses easy-to-find materials and works with different spaces, whether it’s a garden, porch, or door.
1. Painted Rock in the Garden
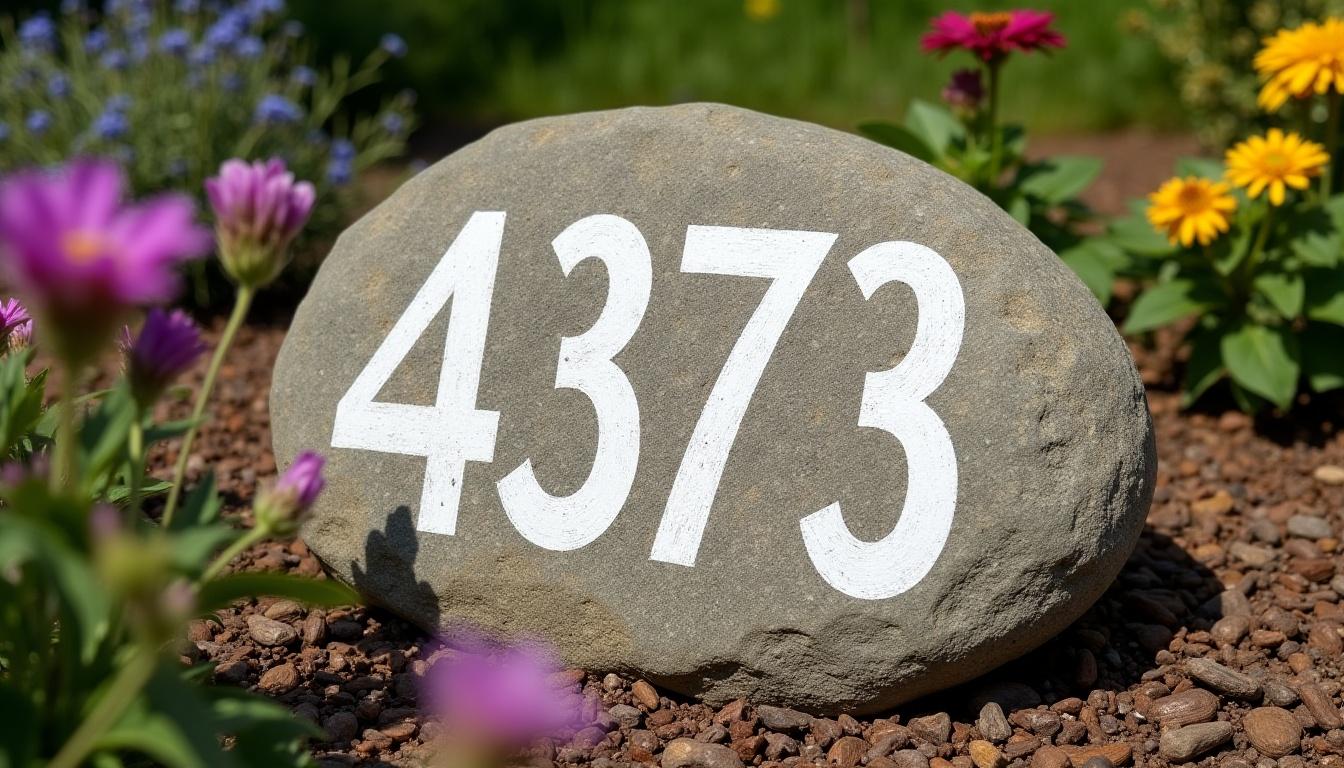
Find a smooth, large rock that will fit well in your yard or flower bed. Wash and dry it completely before painting bold numbers with outdoor acrylic paint.
Choose high-contrast colors to make the numbers stand out from the road. After the paint dries, apply a clear weatherproof sealant to protect it from rain and sun.
This idea is perfect for garden lovers or anyone who wants a natural, tool-free project. Place it near your walkway, mailbox, or steps for easy visibility and added curb appeal.
2. Framed Wooden Panel with Vinyl Numbers
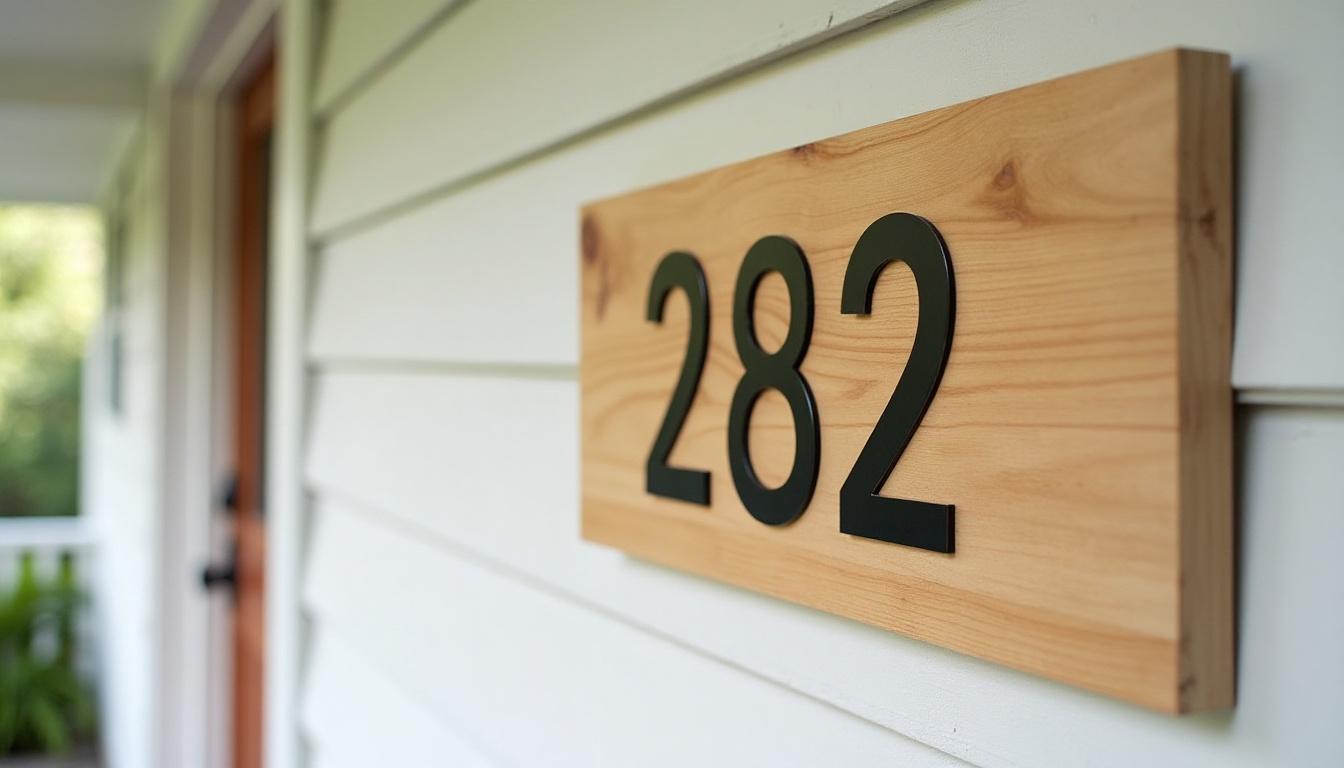
Use a flat wooden board and frame it with narrow trim for a neat, finished look. Depending on your style, you can paint the background or leave it natural.
Apply vinyl numbers to the center. Stick-on options make this project fast and easy. This sign can be mounted on your wall, porch, or fence. If desired, seal it with a clear coat to extend its life outdoors.
The result is clean and simple and fits in with most home styles, from traditional to modern.
3. Ceramic Tile Mosaic Sign
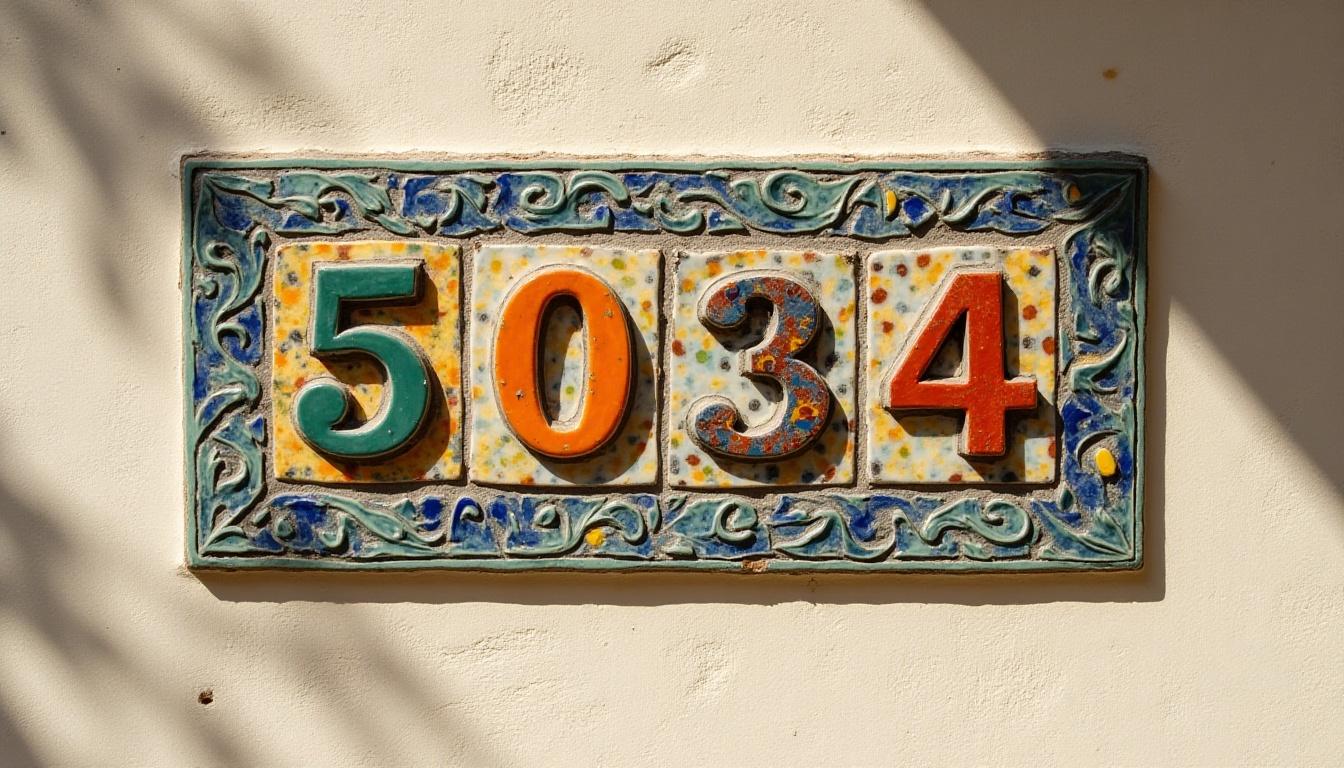
Arrange small, colorful ceramic tiles on a flat wood or cement board to form your house number. Use tile adhesive to secure them, then fill gaps with grout and wipe clean.
Let everything dry, then apply a waterproof sealer for protection. This method adds texture and vibrant color to your sign, making it a true focal point.
It’s a great way to use leftover tiles or customize with favorite shades. Mount it on a wall, gate, or mailbox for a standout look that lasts in any weather.
4. Magnetic Sign for Metal Doors
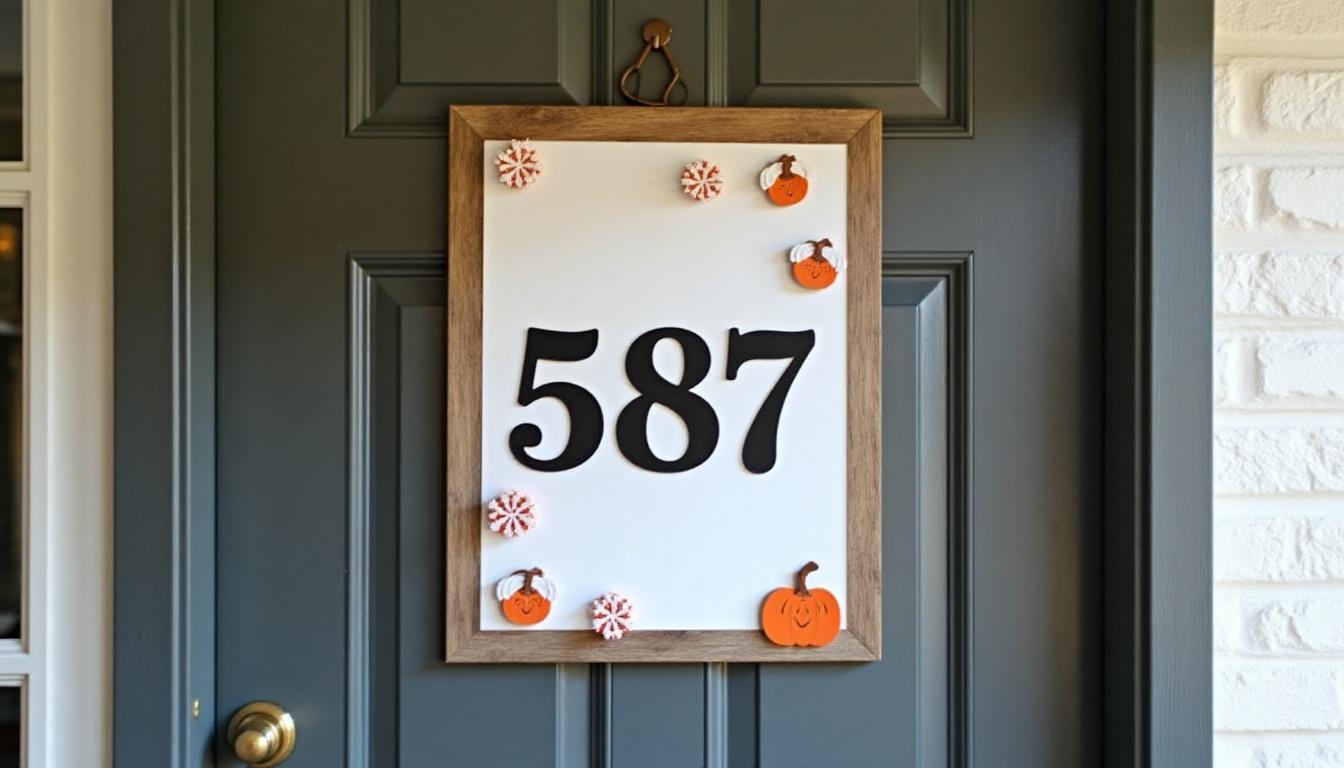
Use a thin magnetic sheet or board as your base and decorate it with numbers made from vinyl, plastic, or magnets. You can paint the background or add seasonal designs for variety.
This type of sign is perfect for renters or metal surfaces, as it won’t damage the door. It’s also easy to move or update as needed.
Great for garages, mailboxes, or apartment doors, this simple project takes less than an hour and allows for plenty of creativity without any permanent changes.
5. Planter with Painted Numbers
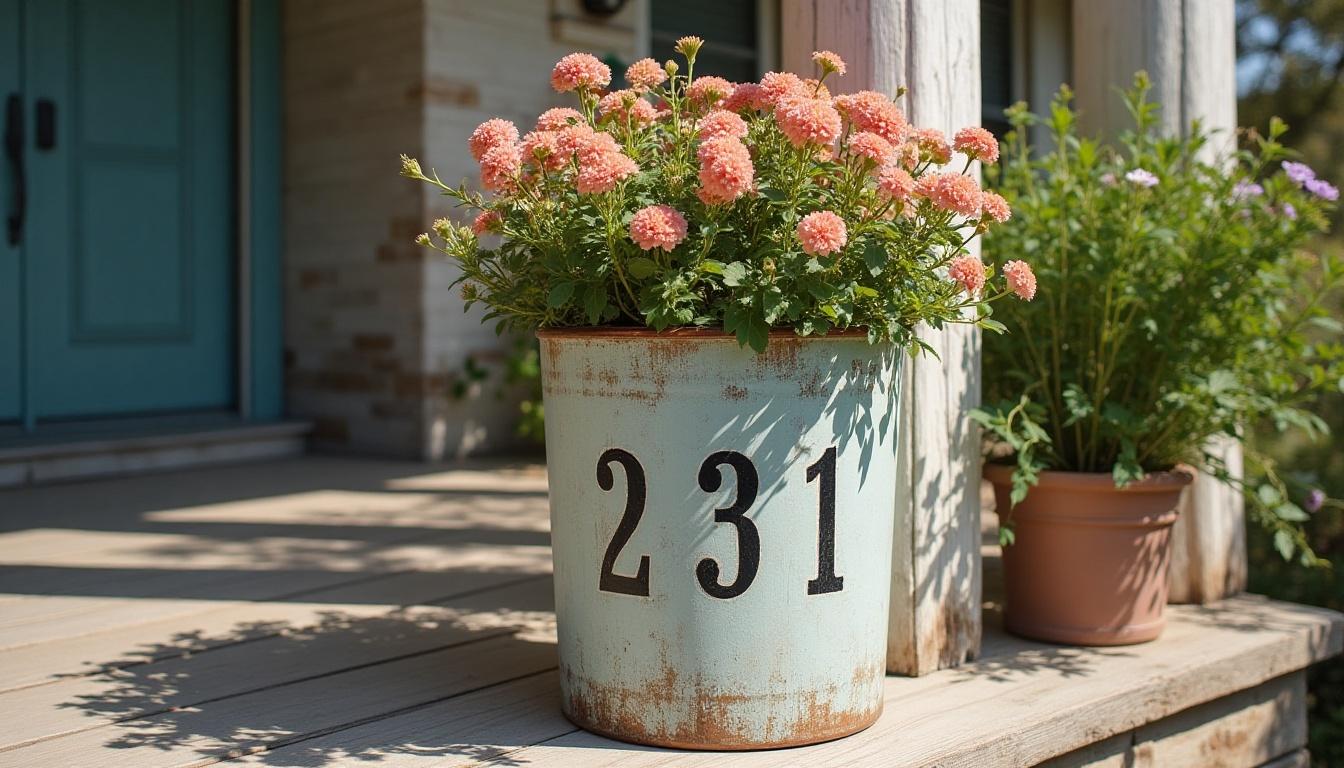
Choose a tall planter made of metal, ceramic, or plastic. Clean the surface and use outdoor paint to stencil or freehand your house number vertically along the side.
Let it dry and seal with a clear spray for durability. Fill the planter with flowers, shrubs, or seasonal greenery to create a welcoming entryway.
Place it near your porch or stairs where it’s visible from the street. This option doubles as decor and a functional address marker, making it ideal for small patios or walkways.
6. Acrylic Panel with LED Strip

Cut a clear acrylic sheet to your preferred size and mount house numbers using outdoor glue or screws. Attach a waterproof LED strip to the back or base to light up the panel at night.
Power it with a solar pack or plug-in adapter. This project combines modern design with practical lighting. It works especially well in low-light areas or homes with long driveways.
Mount it to a wall, post, or wooden frame for a clean look that glows in the dark.
7. Vertical Plank with Stenciled Numbers
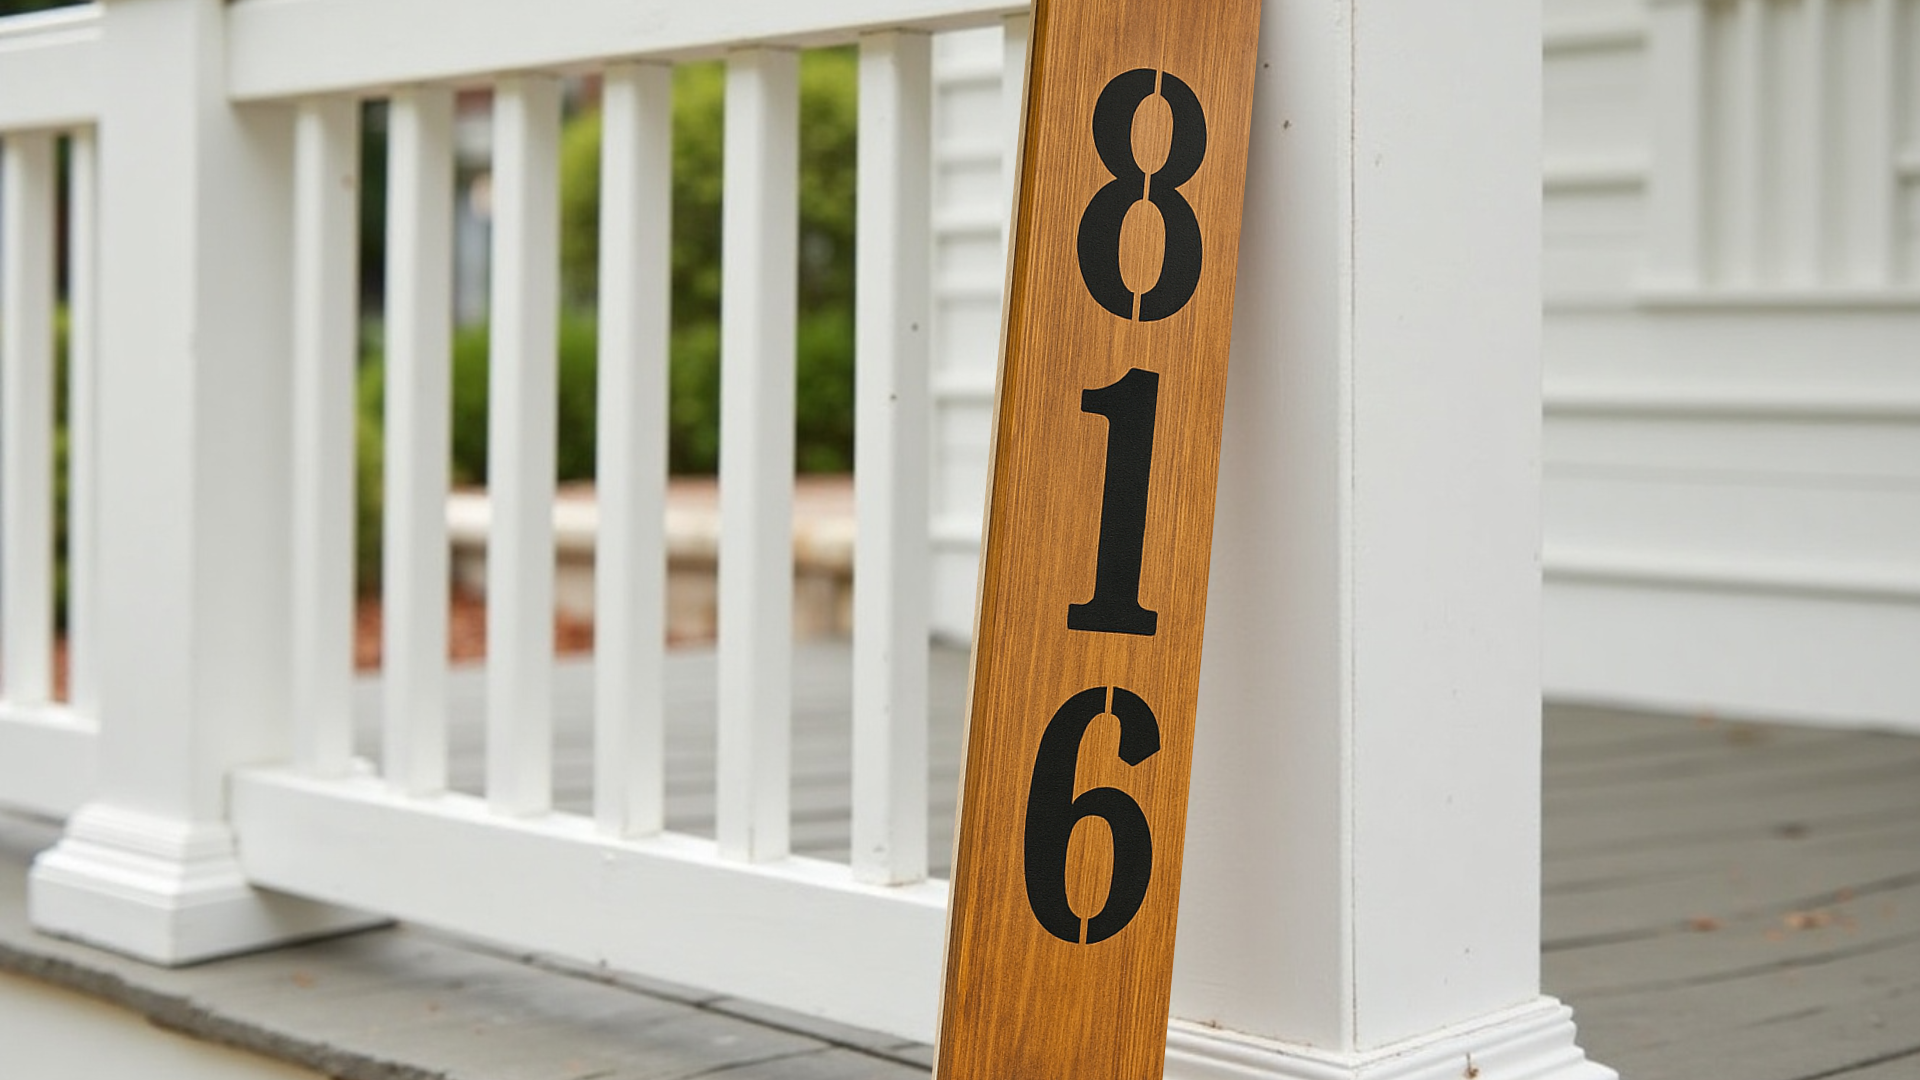
Cut a narrow wood board and smooth the surface with sandpaper. Paint or stain it to match your exterior, then use a stencil to apply your house numbers vertically.
This design is perfect for mounting on porch posts, columns, or walls with limited space. Choose high-contrast colors for easy reading from the street.
Add a weatherproof sealant to keep the finish clean and durable. It’s a great way to add height and visibility without needing much room or complex tools.
8. Hanging Wood Slice with Rope Accent
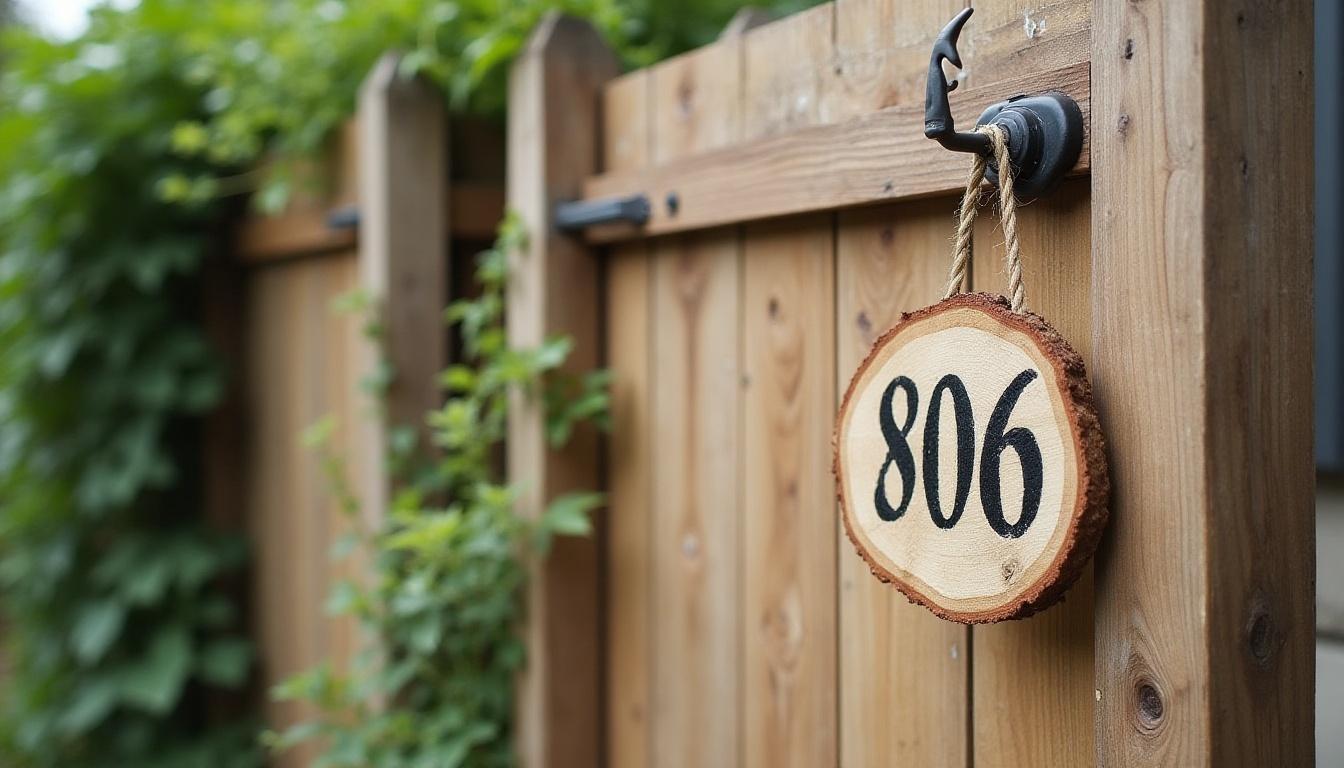
Find or buy a thick wood slice, then sand the surface for a smooth finish. Use weather-resistant paint to paint or stencil your house numbers.
Drill two holes at the top and thread rope or thick twine through to create a hanger. This sign works well on porches, fences, or gates and adds a warm, natural touch.
Seal the wood to prevent damage from the sun or rain. It’s a simple, low-cost option that stands out with rustic charm and handmade appeal.
9. Solar Light-Integrated Sign
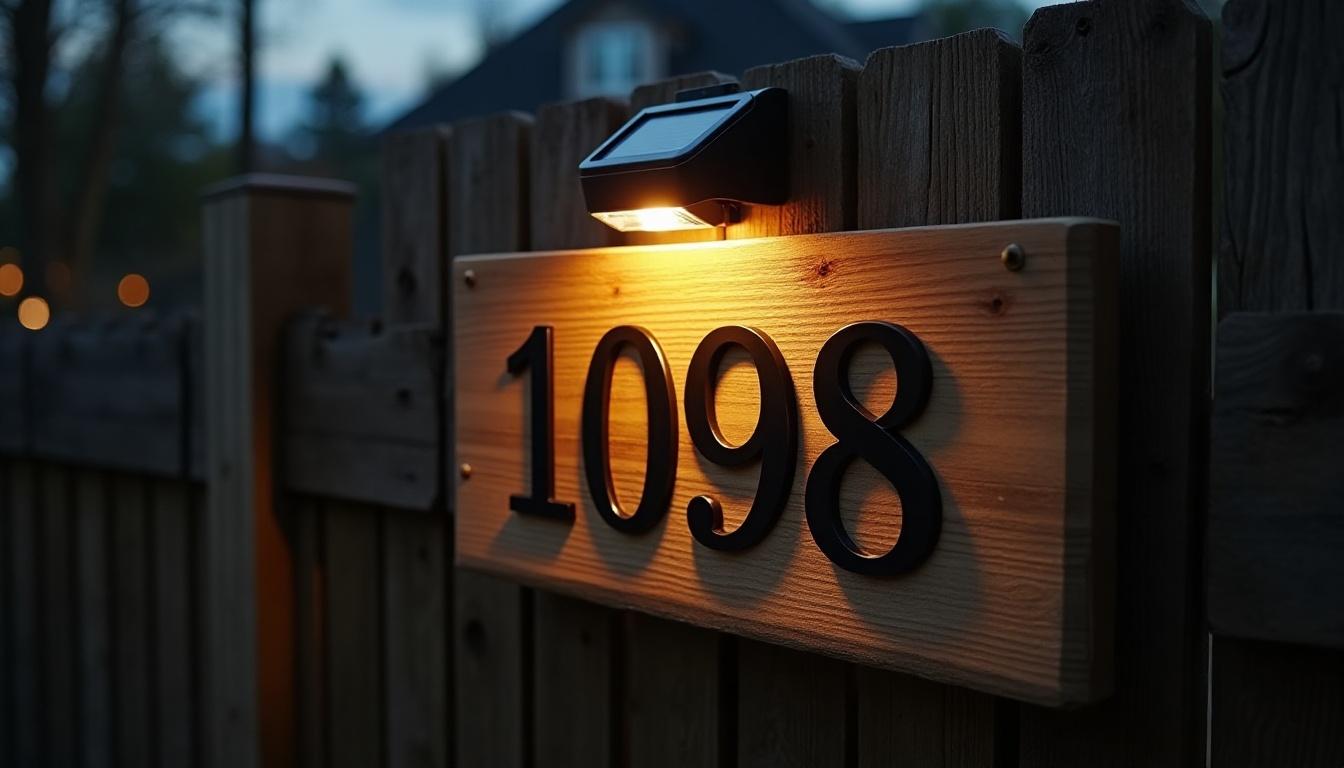
Choose a sturdy backing like wood or metal and attach your house numbers clearly across the surface. Mount a small solar light above or beside the numbers, aimed to shine downward.
Look for models with built-in sensors so the light turns on automatically at dusk. This solution works well for homes with long driveways or limited porch lighting.
It improves visibility for guests, deliveries, and emergency services. Best of all, there’s no wiring involved, just easy setup and reliable nighttime glow.
10. Windowpane Repurpose with Painted Numbers
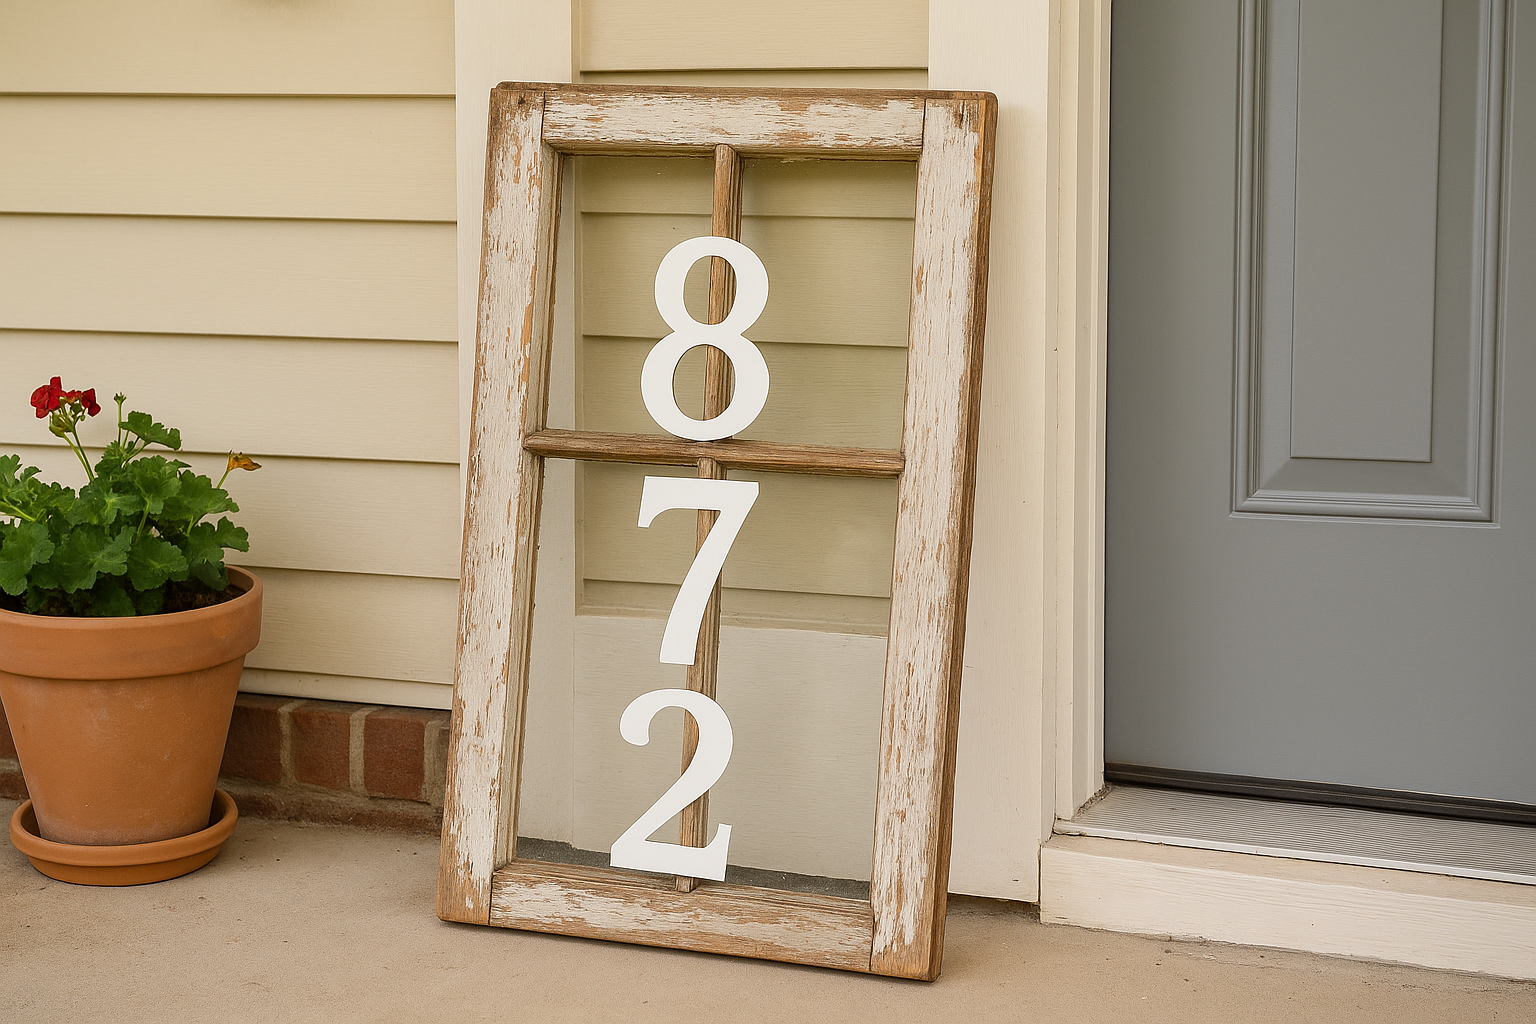
Take an old wooden window frame and clean it thoroughly. Remove or frost the glass if needed, then paint your house number on one or more panes.
You can keep the frame’s weathered look or repaint it to match your home. This project uses salvaged materials and is great for farmhouse or rustic themes.
Hang it on a porch wall or lean it beside your door. With some sealant, it can handle outdoor use and give your entryway personality.
Seasonal or Themed House Number Ideas
Update your house number display for different times of the year or living situations to add personality to your home. These easy swaps and compact setups help you stay festive or functional, no matter the space or season.
Holiday Swaps (Magnetic or Removable Plates)
Use magnetic numbers or hook-and-loop backed plates to swap out your house number design for holidays and seasons. Add a snowflake border for winter, pumpkins for Halloween, or bright florals for summer.
For the decorative elements, use painted wood, metal, or plastic cutouts. Keep the numbers bold and clear to remain readable.
These swaps make it easy to stay festive without redoing your entire setup. Just stick on the themed plate or layer it over your base sign, then remove or change it when the season ends.
Apartment or Small-Space Displays
In smaller spaces, like apartments or condos, you can still have stylish house number displays. Use number decals or vinyl stickers on your mailbox or front door.
For a reusable option, try mini plaques with adhesive backing or small hooks. These can be painted or decorated to match your taste and don’t take up much room.
Choose high-contrast designs so the numbers stay visible from a hallway or common area. These compact options keep things neat, easy to update, and renter-friendly.
How to Protect and Light Up Your Sign
To keep your house number sign looking good and easy to read, you’ll need to protect it from the weather and make sure it’s visible at night. Here’s how to seal it and light it the right way.
Waterproofing Tips
To protect your sign from rain, snow, and sunlight, use a clear outdoor sealant made for wood, paint, or tile. Apply it in thin, even coats and let it dry completely between layers.
Sealing also prevents the colors from fading or peeling on painted or stained signs. For the best results, reapply once a year.
If your sign is mounted on a fence, porch, or post, a proper seal keeps it looking clean and sharp through every season.
Lighting Options
Solar lights are a wire-free and straightforward option for nighttime visibility. Plug-in LED strips can also provide steady lighting near power sources.
Choose lights that aim downward or highlight the sign from behind for a clean effect. Motion-sensor lights turn on when someone approaches, saving energy while keeping the numbers easy to spot.
Use waterproof lights and mount them securely above or beside the sign to ensure consistent coverage and durability.
Top Kits from Etsy, Amazon, and Lowe’s
Compare kits based on contents, ease of assembly, price, and overall durability. Each platform offers something for different needs, from handmade charm to ready-to-install options.
What to Look for in a Quality Kit
A good kit should come with weather-resistant numbers, a durable board, and proper mounting hardware. Look for materials like pressure-treated wood or rust-proof metal.
Make sure the kit includes clear instructions and doesn’t require tools you don’t have. Adhesive-backed numbers are easy but may not last as long as screw-mounted ones.
Choose a kit that matches your skill level and exterior style. Solid options include Amazon’s Modern House Numbers Set and Lowe’s Whitehall Easy Street Address Sign, both reliable for outdoor use.
Conclusion
You don’t need fancy tools or a big budget to make a house number sign that looks good and works well. I’ve done it myself with just a little time and a simple plan and you can too.
Now that you’ve got the steps to plan, build, and protect your sign, it’s the perfect time to try it out. Go bold or keep it simple, just make sure it fits your home and your style.
If you’re up for more hands-on projects that won’t break the bank, check out my other DIY guides. I’ve shared easy, useful fixes you can start today to keep your space looking sharp without spending much.

